Installation instructions for Artologik ProjectManager
This is a short step by step instruction to help you install Artologik ProjectManager. The installation must be carried out on the web server with administrator rights. Do not start the installation if you do not have administrator rights on the webserver.
Please ensure that the System requirements for Artologik ProjectManager are met.
1. On the web server, either download the installation program Artisan Installer (Installation requires an Internet connection) or alternatively the Offline-Installation program for ProjectManager (Installation does not require an Internet connection). The Offline-Installation program must be extracted on the web server.
2. Execute the file "Setup.exe" as administrator.
If you run Artisan Installer:
Expand the drop-down list "Artologik (Release)", select ProjectManager and click "Next".

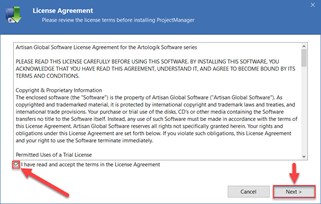
1. Accept the license terms and click "Next" to continue with the installation.
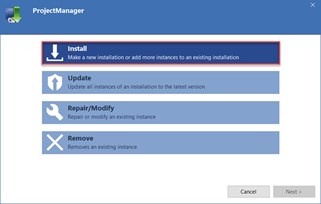
2. Choose “Install”.
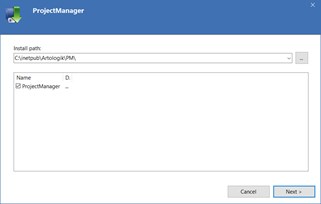
3. Select the installation path for ProjectManager and then click “Next”.
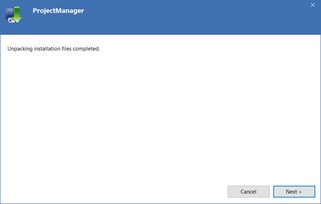
4. In the next step, ProjectManager is downloaded to the server via the Internet if necessary and extracted to prepare for installation. Click “Next” to continue with the installation.
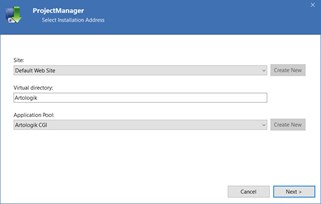
5. Select the Web Site for the installation.
- If the URL for your ProjectManager installation is e.g. http://yourdomain, leave the field empty (remove “Artologik”).
- If the URL for your ProjectManager installation is e.g. http://yourdomain/ProjectManager, change the value in the field "Virtual directory" (change the default value "Artologik" to "ProjectManager" in this case).
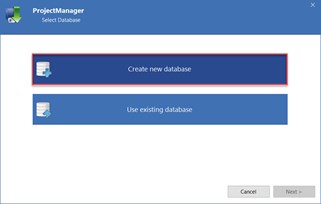
6. Click "Create new database" to create a database for ProjectManager.
Do not use System Databases e.g. "master database".
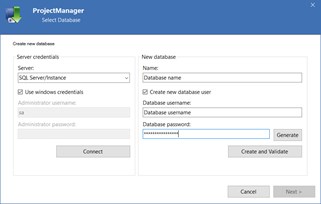
7. Enter the name and instance of the database server and click "Connect". Once the connection has been established, enter the desired database name, database user and password.
Do not use username=”sa”.
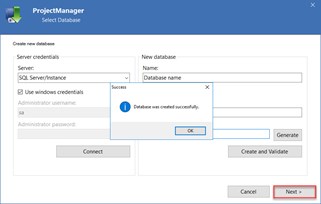
Click "Create and Validate". If the database has been successfully created, you can click "Next" to continue with the installation.
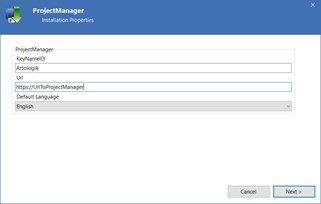
8. The parameter for KeyNameID will be created in the Registry under
HKEY_LOCAL_MACHINE\SOFTWARE\AGS (32-bit System)
HKEY_LOCAL_MACHINE\SOFTWARE\Wow6432Node\AGS (64-bit System)
Enter a different value for the "KeyNameID" field if you have already installed another Artologik program on this server.
Check the value in the "Url" field and adjust if necessary.
The parameter “Default Language” defines default language in the ProjectManager installation and the language for the default Ticket lists for the preinstalled administrator.
9. Check that users IUSR (Internet Guest Account) and NETWORK SERVICE (in French called "SERVICE RÉSEAU") have the MODIFY permissions for all folders located under ..\sites\GUID\ in your new Artologik installation.
10. Run the License program on the web server with administrator rights.
The license key will be installed under
HKEY_LOCAL_MACHINE\SOFTWARE\AGS\<Installation>\License (32-bit System)
HKEY_LOCAL_MACHINE\SOFTWARE\Wow6432Node\AGS\<Installation>\License (64-bit System)
11. The installation is completed. Please include the installation path and the database in the backup routines.
12. The first time you log in to your new Artologik installation, please use the following credentials:
username: admin
password: adminmaster
Please change the password on your first visit. Choose a secure password.
13. Please read the manual for information about the configuration of the program or contact us to get a quote for administrative training/configuration assistance.